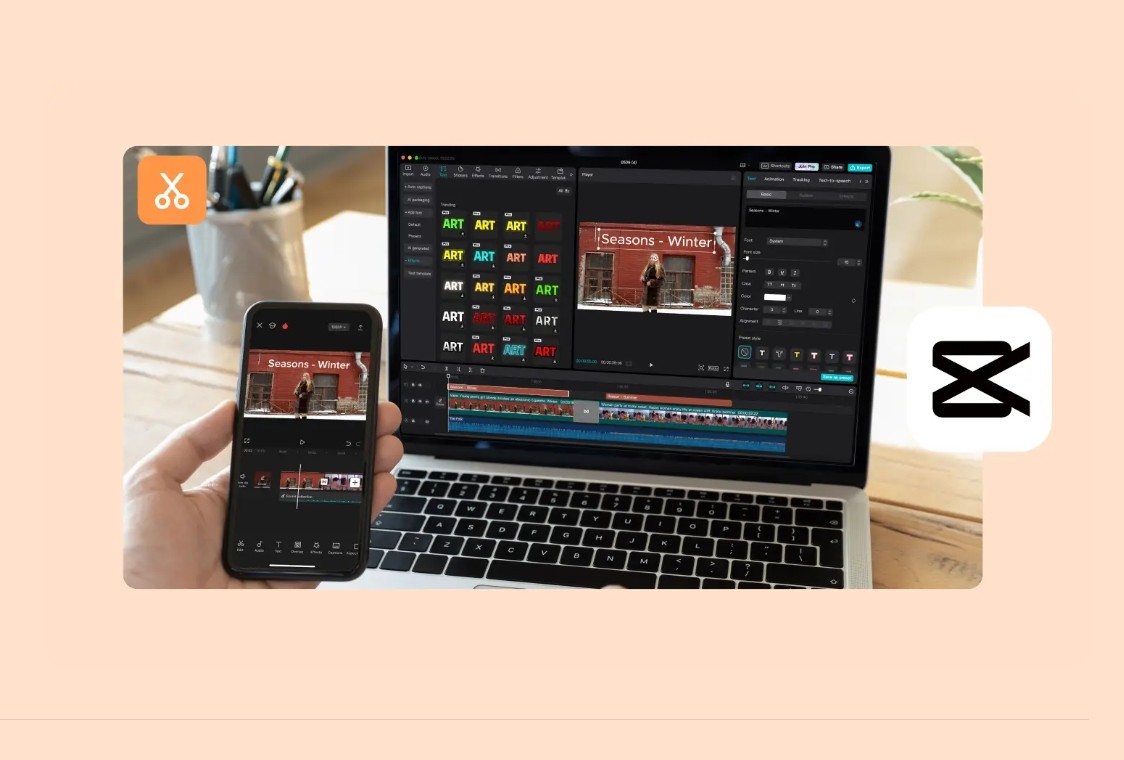
One of the easiest, yet most effective methods of sharing memories, showing ideas, or displaying products is the use of slideshows. Whether building family albums, making a school assignment, or building a professional portfolio, CapCut Desktop Video Editor offers everything you might require. CapCut features a smooth interface and powerful capabilities that help to make a combination of images, transitions, and narration into a unified video without any hassle. Also, the voice changer included in it gives you a chance to put a nice touch to your recording and make your slideshows more interesting and more personal.
This article will take you through the process of making a photo slideshow with voiceover on CapCut Desktop in a step-by-step fashion so that when you are done, you can start with nothing and have a beautiful final product.
Why Slideshows with Voiceovers Stand Out
One of the best methods used to present stories, tutorials, or memories is through slideshows. With voiceover, you provide a context to the images, making them follow the story of what they see rather than watching it in silence. This synthesis generates the emotional appeal, simplifies educational content, and enables the brands to express themselves better. The slideshows with voiceovers will make your videos more professional and effective, whether you want to share some memories about your family or to create a product demonstration.
Why Use CapCut for Slideshows?
CapCut Desktop is more than a simple trimming/splicing clip tool; it is a multifunctional video editor allowing users to combine content, add audio effects, and clean up images in one application. For slideshows, you can:
-
Drag several photos simultaneously and put them in order.
-
Apply smooth transitions between slides.
-
Add background music, sound effects, or your own narration.
-
Customize every frame with filters, stickers, and text.
-
Exports in high quality, ideal to share on social media or put up professionally.
This would make CapCut perfect for anyone who wishes to take a mere collection of photos and make it an engaging video presentation.
Benefits of Using CapCut Desktop Video Editor
CapCut is a fast-growing, popular tool among creators due to a number of reasons. The main advantages include the following:
User-friendly interface – While you may be a beginner in the editing game, the simple yet clear-cut layout of CapCut makes navigation simple.
All-in-one editing suite – You can trim videos, add transitions, effects, and audio without using several apps. It is all developed on a single platform.
High-quality exports – You can send your slideshow or video up to 4K to get a sharp and professional effect.
Built-in creative assets – Built-in music, text styles, filters, and sound effects to make your slideshow even better.
AI-powered features – Tools such as voice changer, auto-captioning, and AI upscaling give you a chance to add a modern touch to your projects.
Cross-platform convenience – Editing on desktop and reworking on mobile with a harmonized ecosystem of CapCut.
How to make a Voiceover Slideshow in CapCut
Before getting down to the minute-by-minute walkthrough, we should prepare. Ensure that you have your photos arranged in a folder and that you have your narration script prepared. Now, follow these steps:
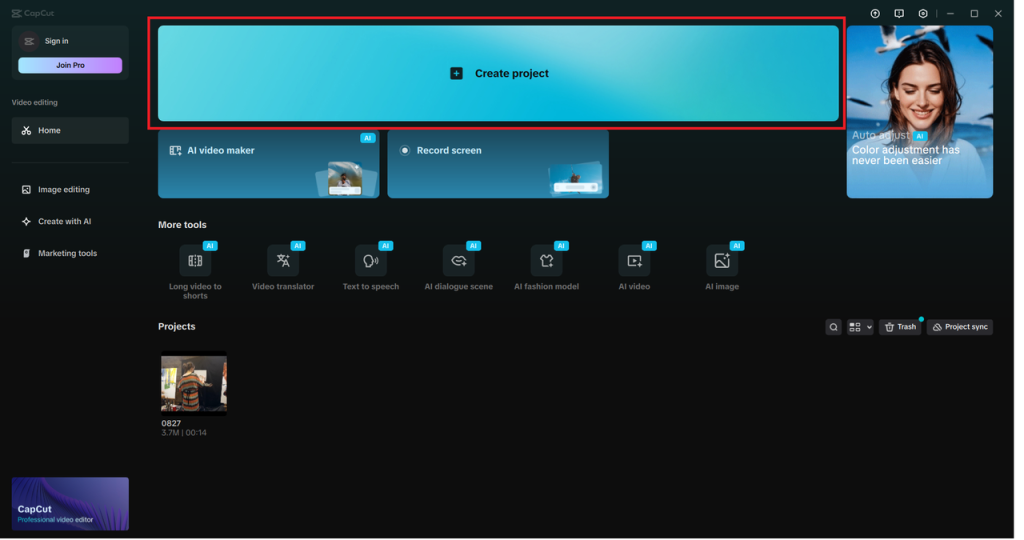
Step 1: Launch CapCut and Start a New Project
Start Open CapCut Desktop and choose New Project. You can choose the photos to include in your slideshow at the import window. They will be posted in the Media library so that they can be accessed easily.
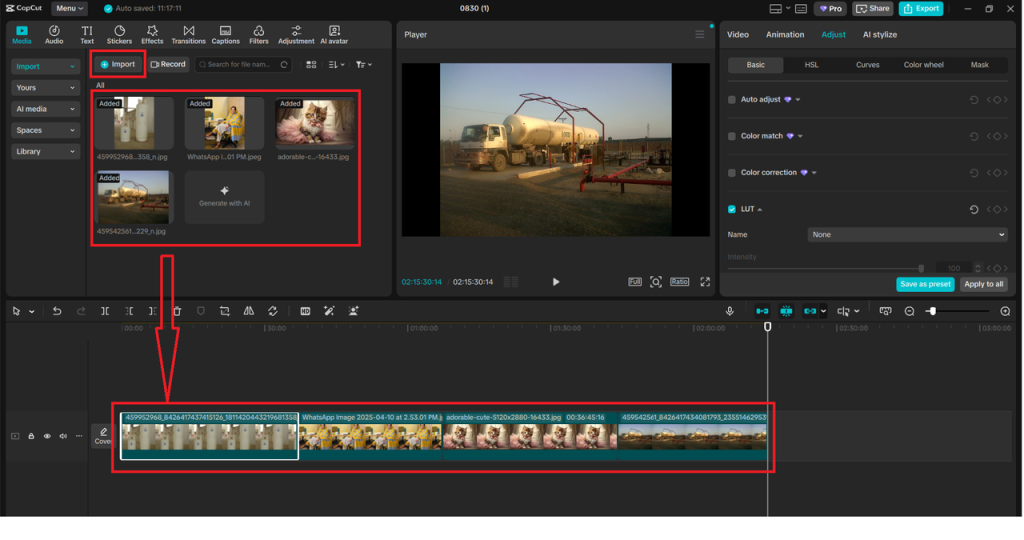
Step 2: Add Photos to the Timeline
Take your selected pictures in the Media library, drag and drop them to a timeline. Put them in the sequence in which you desire. You can also resize the length of each photo by dragging the sides.
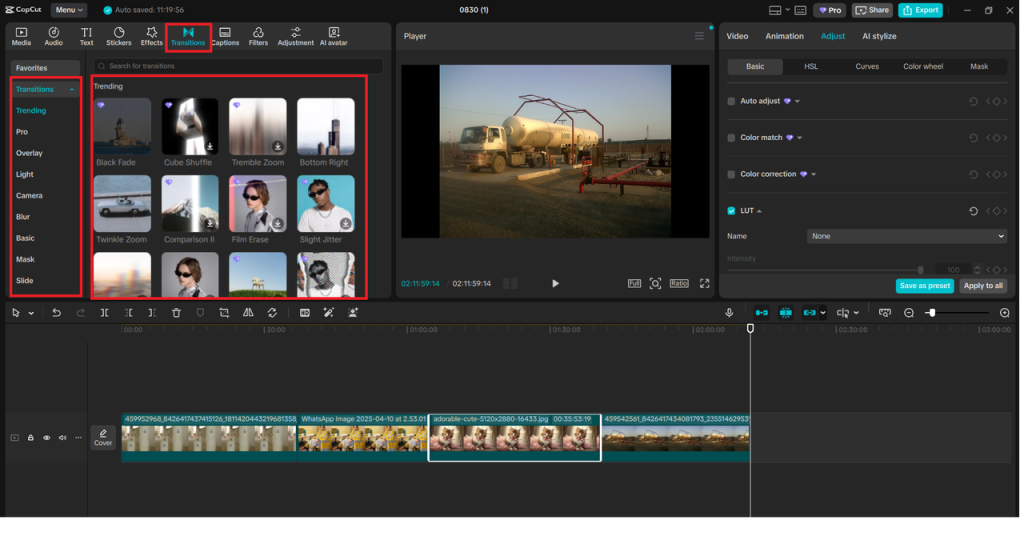
Step 3: Apply Transitions and Effects
Click on the Transitions tab at the top. Select a transition, including fade, slide, zoom, and drag it between your photos on the timeline. You can also use filters and text effects on the sidebar to improve visuals.
Step 4: Record or Import Voiceover
Click on the toolbar on the voiceover (microphone icon) option. There will be a recording panel. To tell your slideshow, click Start Recording. You can change your voice, use the Voice Changer effect when you are finished recording. Or, bring in a voiceover that has been recorded on your computer.

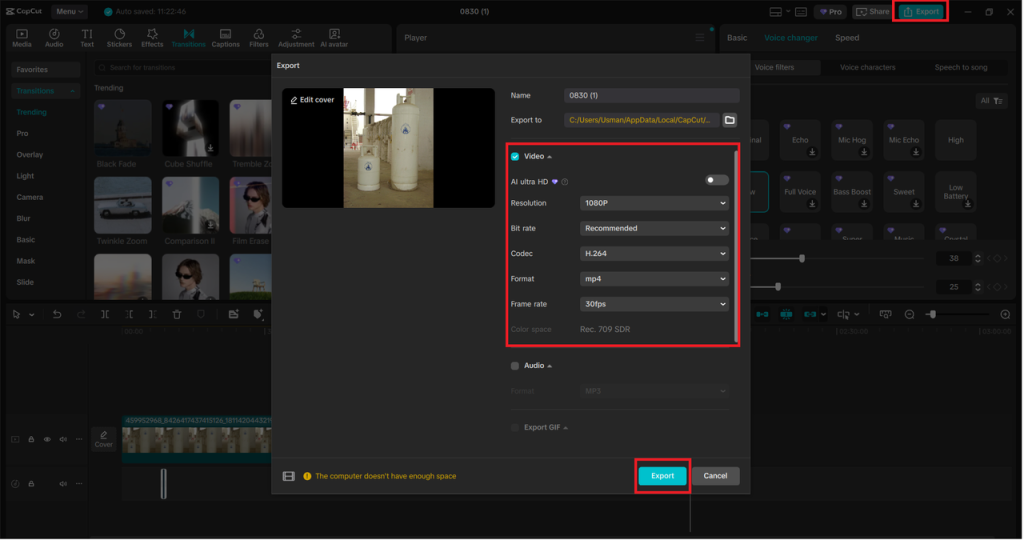
Step 5: Export the Slideshow
When you are convinced, choose Export in the upper right-hand side. Make amendments to the resolution, format, and file name, and repeat the process of clicking Export. Your photo slideshow is finally finished with a voiceover.
Bringing It All Together
CapCut Desktop takes the slideshow to a new stage, whereby the photos are arranged together. You can record your narration, edit your voice with in-built tools, and refine the images with effects. And the best part? CapCut is not restricted to slideshows alone; it can also act as an online photo editor substitute to do simple image work within your video projects.
Conclusion
CapCut Desktop allows creating a slideshow with photos and voiceovers with ease, even for novices. You can also create interesting projects without having to use many applications; features such as seamless transitions, built-in audio tools, and high-quality export can be used. No matter what you need to tell yourself, present to audiences, or create social media content, CapCut provides it all under one trusted video editing software.
When you need something easy yet with strength, then CapCut is your editor. Test it and you will find out how much fun and creativity you can open up with a slideshow.


Just for you
By Jacob Mallinder - September 16, 2025