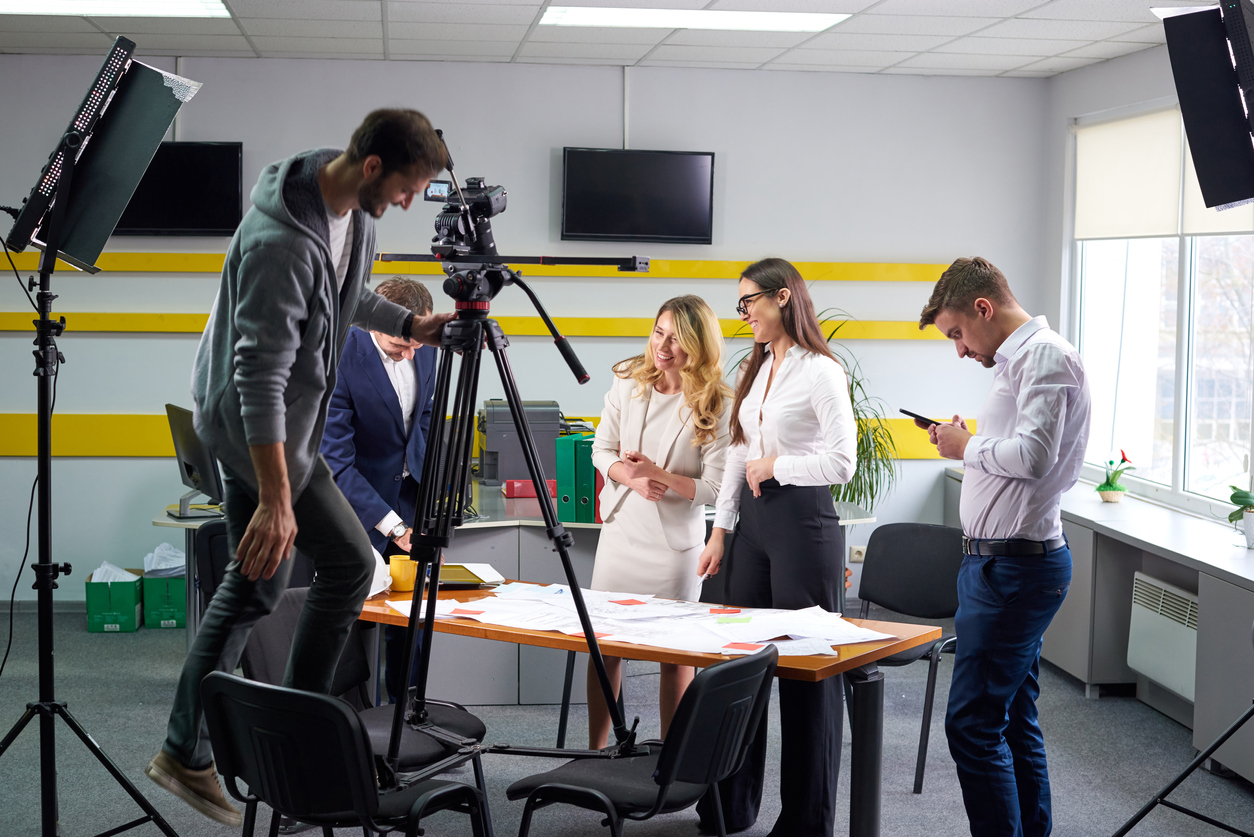
According to Hubspot, 81% of businesses currently use video as a marketing tool — up from 63% over the last year, and Quartz reports that a Facebook executive predicted their platform will be all video and no text by 2021. If this doesn’t excite you to go out and buy a camera, I’m not sure what will.
If you do feel like your company or business is at the stage of producing its own photo and video content, without having to outsource a separate media production firm, then look no further. Below CEO Today has put together a brief and user-friendly review list of our favourite must-have items for easy in-house video and photo production.
You’ll, of course, need the right training, skills and software to put together your photos and videos, but here are 10 items that together makeup everything you need to get the job done in-house.
Camera
Canon EOS R
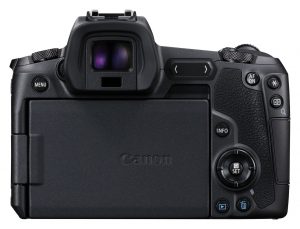
To start off with you’re going to nee
d a camera, hopefully, a hybrid that can take both great corporate photos and great HD video. We recommend the Canon EOS R. It came out in 2018, made waves in the camera industry and is used by many professional photo and video companies worldwide as their go-to easy-to-use lightweight choice.
It will produce high-quality photos, and with its amazing autofocus capabilities, it pretty much does the job for you. You just aim and shoot. You’re guaranteed great images from its mirrorless full-frame 30.3-megapixel sensor. Equally, it has a tilt screen and can film in both 1080p and 4K, with great colour output and seriously good video autofocus.
If you purchase this with its own kit lens, you’ll be well on your way to having a reliable and top-quality video setup.
Canon C200
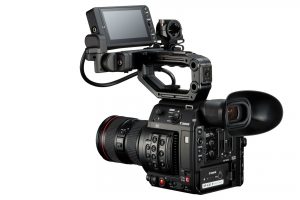
This is a second camera for those businesses that want to expand more on the video side of things, The EOS R does a great job, but if you want even better video results, the Canon C200 is part of Canon’s cinema range. It’s not the latest cinema camera they have released but fits the bill for your goals. The benefits of having this over the EOS R is that is has a much higher dynamic range, meaning shadows and highlights are displayed much clearer and without quality loss, in addition to the fact it can also record video for as long as your SD cards will allow, unlike the EOS R which can only record up to 30 minutes of footage at a time. If you’re recoding corporate interviews, this would be an issue, as you would have to pause and resume the interview.
You’ll also find that the batteries on of the C200 last way longer, and the ability to record both full files and proxy files (used for editing) at the same time, will make the post-production workflow that much easier.
Lighting
Aputure 120D
Once you have the right camera you’ll need to think about lighting. For most semi-professionals in the industry, the Aputure 12D mkII is the go-to lighting rig. It’s a large easy-to-use bi-colour continuous light that can either run on batteries or AC power.
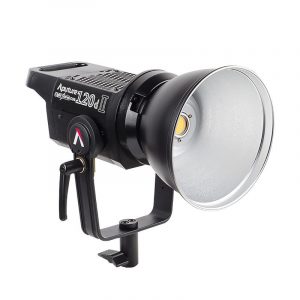
It can get very bright. In fact, you’ll likely never use it at full brightness, but it is the perfect key light for all of your subjects, both for photography and videography. The key light is your main source of illumination in the room (unless you have a window or direct sunlight), and with a diffuser attached, it will create a beautifully-lit atmosphere around and on your subject.
This one is a little more expensive than most semi-professional lighting systems, but we’d recommend shopping around for something within your budget keeping in mind that lighting is one of the most important parts of the setup and using the wrong light, or bad light, will ruin your results.
Neweer LED Panels
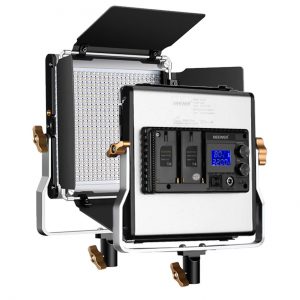
In addition to a key light, you will need to light up the side and background around your subject. You can use LED panels, like these Neweer LED Panels, to add a sidelight, or hair light to your subject, and/or light up the backdrop of your set, so that the subject does not merge into the background with everything else.
These don’t have to be super bright, and should actually be quite subtle, but will add vivacity and emotional elements to your storytelling. For photos, they will be useful in adding clarity to your photos and getting the tone and colour of the room right. Also, don’t be afraid to experiment with colour gels, light diffusers and reflectors, as lighting dynamic can make or break the message you’re trying to deliver.
Audio
Shure TL48
If you are focusing on in-house video production, then your third priority is going to be audio. If you’re only looking to do photo, perhaps skip this section.
Recording using the in-camera audio won’t cut it. For a quality production, you’re going to need several microphones, and good ones at that. We recommend the newly introduced Shure TL48 as the go-to lapel microphone of choice.
For professional corporate videos, you want speakers to be heard clearly, with crisp full-sounding audio. The TL48 has a tailored response with a mid-range rise that’s ideal for speech and dialogue applications, such as film and TV. Designed with leading audio professionals’ input, the TL48 is easily concealed in a costume or directly against the skin under wardrobe, and offers extensive accessories to ensure quick, easy, and secure mounting—all with no impact on sound quality. Your audience needs to be able to hear the full weight of your business’ voice, so this is ideal.
We tried this lapel microphone out and found it to be more than satisfactory. Our subject, being interviewed, could be heard well and concisely, with the microphone picking up a well-rounded representation of her voice. In addition to this, she was able to fix the microphone herself, with no issues, and this is what you want from a good microphone really: no issues and peace of mind that as long as you hit record, your audio file is going to sound great.
Rode VideoMic Pro+
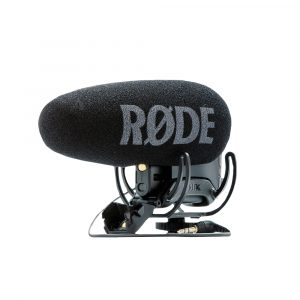
The Rode VideoMic Pro+ is the most expensive of Rode’s on-camera microphone options, but also the most versatile and useful. Firstly, it auto-powers on and off with your camera, which avoids easy mistakes such as not switching the microphone on before hitting record. It offers several gain options, sits on a shock mount in case there is any movement happening on your shoot, and it actually sounds really good.
This is a directional microphone, however, so if pointing forward the person behind the camera wouldn’t be heard well, but the sound or voices it is pointing towards will be heard wholly and completely. Overall, it’s a great option for on-camera audio and a simple setup option.
Tascam 701-D
If you’re using the C200, then alongside the Rode Video Mic Pro+ and the Shure TL48 you’re set, as it has built-in pre-amps and XLR inputs. However, if you’ve gone with the EOS R or any other smaller DSLR or mirrorless option, then you likely won’t have an XLR input, meaning you’ll also need a separate audio recorder with its own pre-amps.
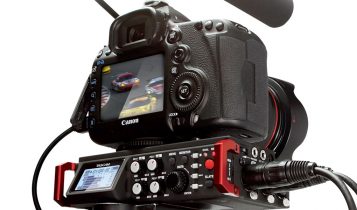
In that case, we’d recommend buying the Tascam 701-D. It has 4 main XLR inputs and its own built-in microphones (don’t use these though). It can record two of the above TL48 lapel microphones, with separate mixes and files, and an additional two channels of the same at -12 decibels, just in case your speaker or presenter goes starts shouting or laughing uncontrollably.
The pre-amps are some of the highest industry standards and will serve your audio input well. These files are then recorded on a separate SD card and can be synced up to your footage via timecode, or you can plug the overall mix form the Tascam 701-D directly into your cameras standard microphone jack and record the audio straight to your live footage.
Accessories
Atomos Shinobi / Ninja V
An external monitor will help you out a great deal in both photography and videography. For starters, whichever camera you decide to grab form the above, the monitor with which you can see your subject and scene is going to be small – it’s usually anywhere between 3 and 3.5 inches.
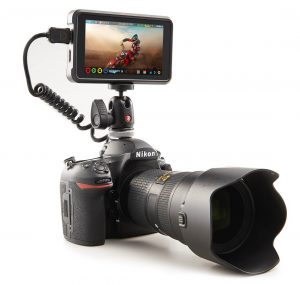
Both the Atomos Shinobi and Atomos Ninja V are 5-inch screens that allow you to see what you’re shooting on a much larger, brighter and clearer screen. In addition, they both offer focus peaking, false colour and several other fancy features that will help you make the most of your shooting session. This isn’t a must-have gadget for your setup, but if you want to avoid time-consuming or costly reshoots, it will make your production flow much easier.
On top of the usual features the Shinobi offers, the Ninja V is also an external recorder, meaning that via the HDMI-out port on your camera, it can record its own files straight from your camera’s sensor. Both the cameras above offer a clean output via their HDMI ports, meaning you can use an external recorder without it recording all the screens information such as shutter speed and aperture etc. The Ninja V’s recording capabilities have no time limit, meaning that if you get the Canon EOS R, you will be able to film interviews for longer than the EOS R recording limit allows (and at a higher bit rate). If you’re happy recording interviews at less than 30 minutes at a time, then the Shinobi costs less and does the same stuff without the recording feature.
Manfrotto Tripod
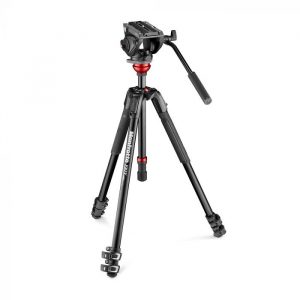
Now that you have your whole setup ready to record, you can either hold your camera or pop it on a tripod. I’d recommend the latter, as you’re going to have zero vibrations, stutter, knocks and jitter.
Especially if you’re recording corporate interviews or shooting corporate headshots, you’ll want to place your camera and accessories on a tripod, and stick to one position throughout the entire shoot. You don’t need a huge industrial tripod to do this, a small lightweight and compact tripod does the job very well. We recommend the Manfrotto 500 fluid head with 190X legs – it’s very versatile, offering several levels of height, stability, a counter-weight system, and the materials are super durable. If you get this, you’ll likely never have to buy a tripod again. I’ve tried it myself, and I have to say I’ve been very impressed with how sturdy it is, especially when compared with its minimal weight. It doesn’t quite fit in a travel bag, but it is small enough to pack into a stand bag or large suitcase, so keep this mind if you’re planning on taking your gear to a conference or event.
Lastolite Backdrop
Finally, for all the photography and headshots you’re planning, you may need a backdrop. Most offices have nice clear walls, but you’ll likely find that these walls reflect light oddly, have dirty streaks or are simply too ‘boring’ to make for great photos. A backdrop is easy to manage, quick to throw up and down and will make your shots look super professional.
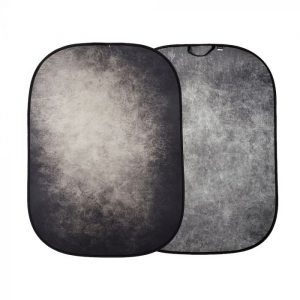
The Lastolite Vintage Collapsible Background is large enough for a corporate shoot (1.5 x 2.1m), whether its video or photo, yet small enough to carry from room to room and fit on a standard size light stand. This will add a distinctive look to your corporate shots and it’s double-sided, so you get to great backdrops for the price of one.
We’d also recommend you grab one of these Magnetic Background Support arms from Lastolite, which will make the whole process easier, save you effort trying to pin up the background, and keep your equipment’s footprint to a minimum. It’s also really good for raising reflectors and diffusers on set, or just hanging some fairy lights from for a nice bokeh-full background effect.
Now that you have everything you need for your in-house videography and photography projects you’ll never have to outsource help again.
If on the other hand you think this is all too much of an investment and would rather have a professional videography and photography service come in to help, then make sure you choose the right team for the job.
Once you're ready to get going without any outside help, then grab yourself some video software, perhaps use Adobe Lightroom for your photo editing, and get learning!